Spineboy
Spineboy is a complex example project demonstrating the use of many Spine features, including meshes, IK, transform constraints, and clipping. Below, we focus on the setup of the skeleton.
Hip
The hip bone is the root of Spineboy's body bone hierarchy. Spineboy's legs use IK constraints which target bones on the same hierarchy level as the hip bone. This is done so Spineboy can be moved independently from the IK target bones. Were we to use the root bone as Spineboy's hip, we could not move the hip without moving the IK target bones. The below GIF illustrates this using a simplified setup.
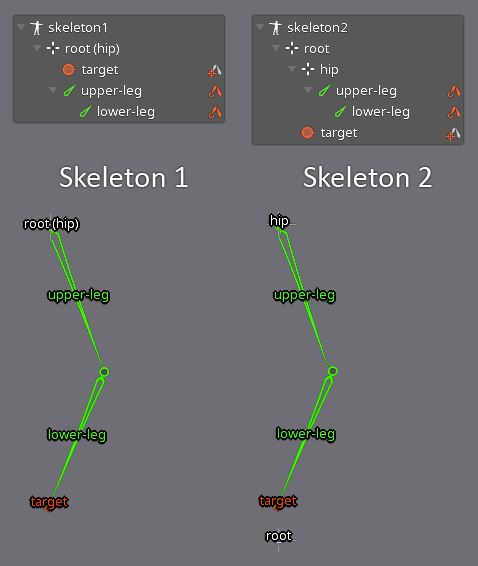
To the left, the skeleton root bone is used as the hip. Moving that root bone also moves the IK targets. To the right, the hip bone is a separate bone and attached to the root bone. The IK targets are siblings. Moving the hip bone does not move the IK targets.
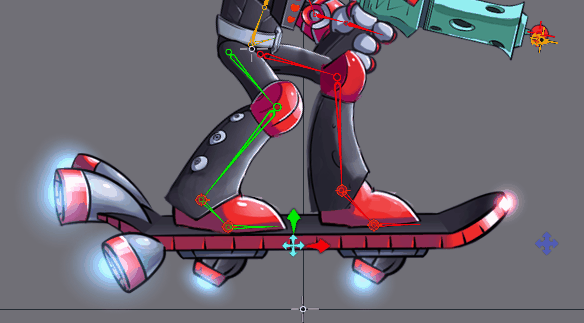
Legs
Spineboy's legs are driven by IK constraints, which is commonly used to keep a biped's feet firmly planted to the ground while the upper body moves. IK is also a great way to efficiently simulate the bending behavior of legs and ankles.
Spineboy's front and back legs are setup in the same way. For brevity, we will only discuss the front leg in detail.
The two-bone IK constraint front-leg-ik controls the leg's front-thigh and front-shin bones, while the single-bone IK constraint front-foot-ik drives the front-foot bone. Note that the order in which those two IK constraints are applied to the bones is important. We first apply the front-leg-ik constraint and then the front-foot-ik constraint. The order in which constraints are applied is defined by their position in the Constraint node of the tree view.
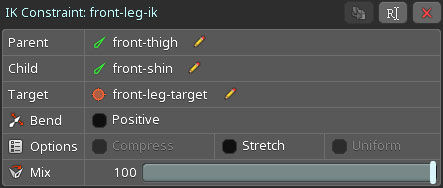
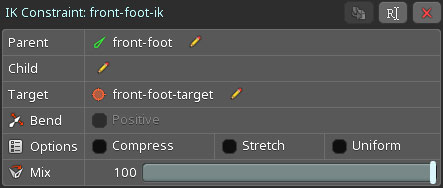
Each IK constraint ensures that the constrained bones point at their respective target bones. The front-leg-ik constraint targets the front-leg-target bone, while the front-foot-ik constraint targets the front-foot-target bone.
To make the foot bend when the ball of the foot is rotated, the front-leg-target bone is parented to the front-foot-ik bone. When the front-foot-ik bone is rotated, the front-leg-ik is transformed as well.
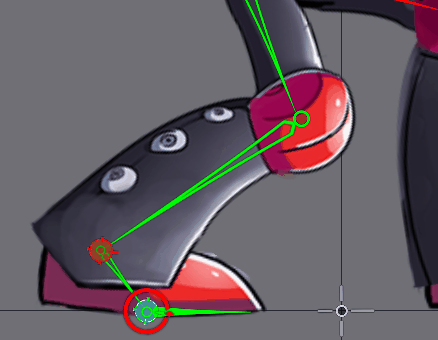
At the tip of the foot, we have the front-foot-tip bone. This bone is not affected by any IK constraints. We also disabled Inherit Rotation on front-foot-tip to ensure the foot doesn't go through the ground when rotating its parent bone.
Hoverboard
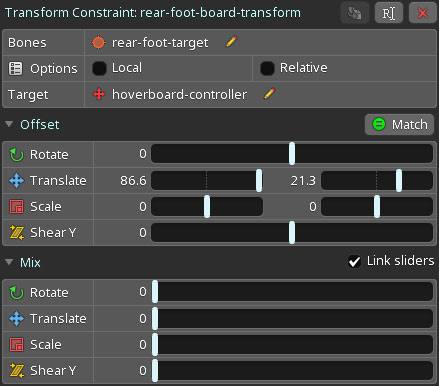
Spineboy comes equipped with a hoverboard, as can be seen in the hoverboard animation. To ensure Spineboy doesn't fall off his hoverboard, we use two transform constraints: front-foot-board-transform and rear-foot-board-transform. For brevity, we'll only discuss the front foot transform constraint, as the rear foot constraint works in the same way.
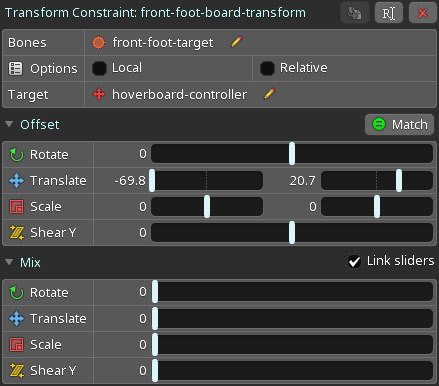
The front-foot-board-transform constraint constrains the front-foot-target bone, which is responsible for transforming the front foot of Spineboy via an IK constraint. Since this transform constraint is applied after the IK constraint, it overrides the effects of the IK constraint to take control of the front foot. The front foot is placed on the hoverboard by setting appropriate values for the the transform constraint's Translate offset using Match.
The front-foot-board-transform constraint targets the hoverboard-controller bone. The hoverboard-controller bone is a child of the root bone and is used to move the hoverboard around.
The Mix values of the transform constraint are set to 0 in the setup pose. This means that by default, the transform constraint does not affect the bone it constrains, in this case front-foot-target.
If we want Spineboy's front foot to be placed on and follow the hoverboard, we can key the Mix for the Translate component of the transform constraint to 100%. This is done at the beginning of the hoverboard animation. Since the transform constraint is applied with a 100% mix after the IK constraint, the IK constraint's influence is completely overwritten by the transform constraint. For Spineboy, this means his front foot is firmly attached to the hoverboard for the remainder of the animation.
Using transform constraints like these simplifies animating Spineboy on the hoverboard. Only the the hoverboard needs to be animated, while the legs follow automatically in a natural way.
In this animation, the angle of the hoverboard is changed by moving the board-ik-target bone at the tip of the hoverboard. It controls the hoverboard-controller bone via the single bone IK constraint board-ik.
Since the position of the hoverboard defines the position of the feet, we again need to ensure the order in which our constraints are applied is correct. First, we need to apply the board-ik IK constraint, since it defines the hoverboard's transform. Only then can we apply the front-foot-board-transform constraint, which places the foot on the board. The order in which constraints are applied can be defined in the Constraints section of the tree view.
Aiming
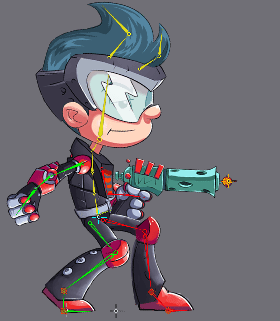
When Spineboy aims, he moves not only his arm holding the gun, but also his torso, head, and front arm. All of this is controlled by a single bone to ease the animation process. It also enables letting Spineboy aim at a point at runtime by programmatically moving the control bone. This is achieved by using another set of constraints.
In Animate mode, with the aim animation active, a bone named crosshair appears in the editor viewport area. Spineboy aims at this bone, as seen below.
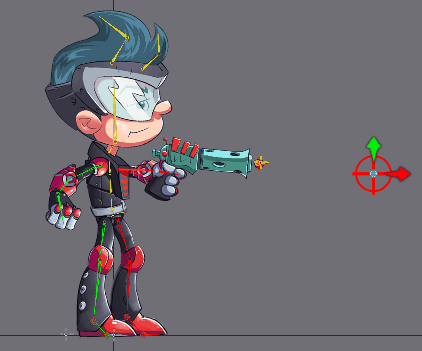
For this effect, we use a single bone IK constraint named aim-torso-ik. This constraint drives the aim-constraint-target bone, a tiny bone parented to the hip bone.

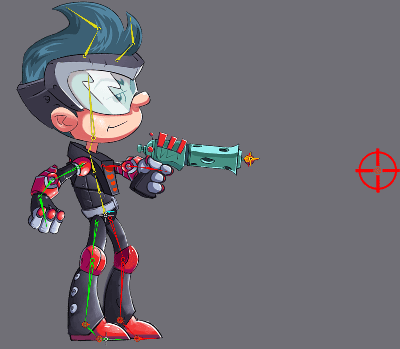
This bone always points at the crosshair and gives us a direction for the three transform constraints aim-torso-transform, aim-head-transform, and aim-front-arm-transform. These three constraints are applied after the aim-torso-ik IK constraint.
Each of these transform constraints have different Offset values. These control the initial position of all affected bones for the aim animation.
The Mix values define how much effect the constraint has when moving the crosshair bone. For example, we can change the Mix on aim-torso-transform to 0 to prevent any rotation of the torso.
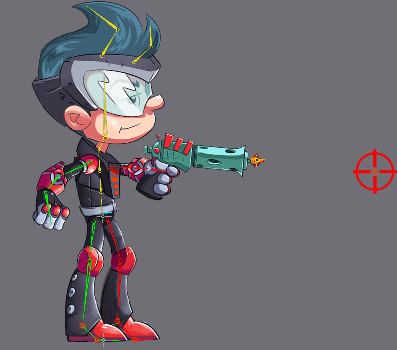
We can also key the Mix value to 42.3 to give a little rotation and a more natural feel to the aiming motion of Spineboy.
Layering the aim animation
The aim animation can be layered on top of other animations, for example, to enable Spineboy to aim and run at the same time. The Preview view can be used to see the effect of layering multiple animations.
In Setup mode, open the Preview view, select Track 0, then select the run animation. Next, select Track 1, then select the aim animation. Lower tracks are applied first, so the run animation is applied, then the aim animation.
While the animation runs in the Preview view, select the crosshair bone in the editor viewport and move it around. The Preview view shows Spineboy aiming at the moving crosshair while running.

The same can be done in games and applications by using the Spine Runtimes. The Spine Runtimes let you programmatically playback multiple animations on different tracks and manipulate bones, giving you the same control you have in the Spine editor.
Portal
Spineboy's portal animation uses non-uniform scaling and clipping to achieve a portal effect.
Portal setup
The portal is made up of a set of layered images, giving the portal depth.
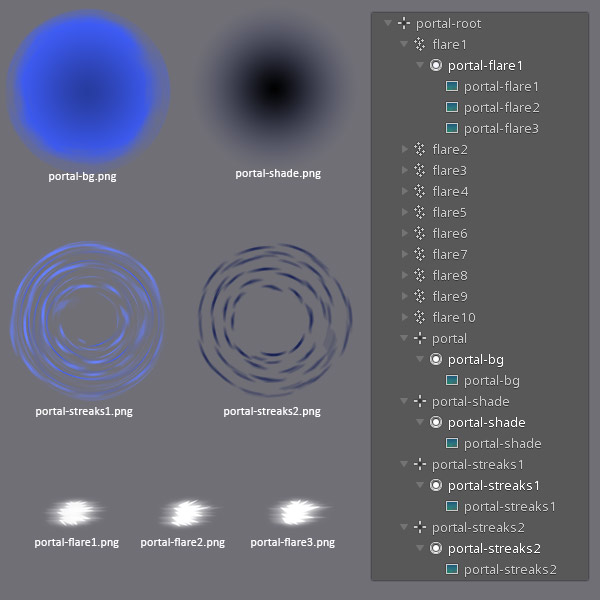
The portal-bg.png, portal-shade.png, portal-streaks1.png, and portal-streaks2.png are all circular images, and not elliptical, like they appear in the animation above. If the images were elliptical, they could not be made to appear as if the portal is rotating while keeping their shape.
To achieve the elliptical rotation of the portal, we apply non-uniform scale to the portal-root bone, squishing the portal on the X axis. We then apply rotation to the child bones portal-bg, portal-shade, portal-streaks1, and portal-streaks2.
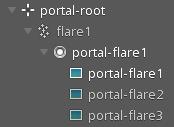
These flare images make up a traditional frame-by-frame animation with 3 frame. The frame-by-frame animation is achieved by keying the visibility of each attachment at the appropriate times in the animation, surrounding Spineboy with sparkly flares when he exits the portal.
Clipping
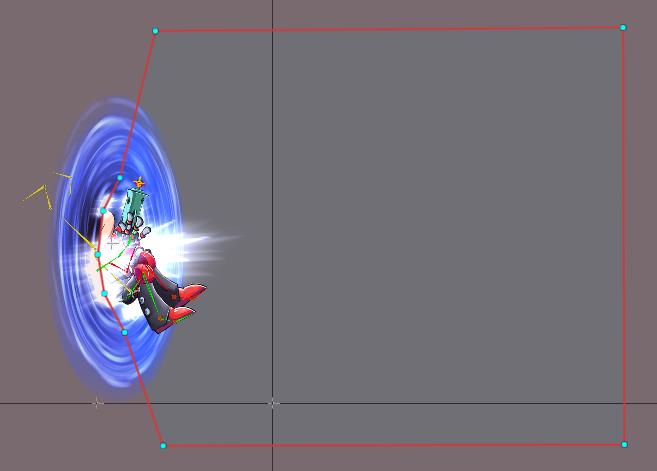
Spineboy appears to come out of the portal, with the parts of him inside the portal being invisible. We achieve this by using a clipping attachment.
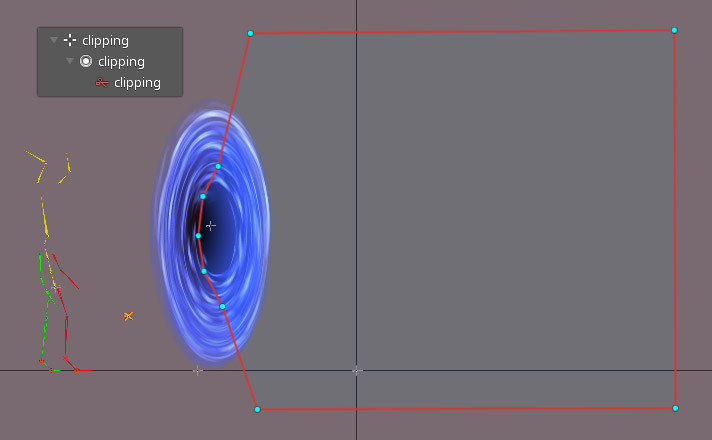
The clipping attachment's polygon defines the area within which Spineboy is visible. Any parts of Spineboy outside this area will be clipped and hence be invisible.
Which parts of the skeleton are affected by the clipping attachment is defined by the clipping attachment's position in the draw order, and its End slot property. Any attachments for slots in the draw order between the clipping attachment slot and the End slot will be clipped.
In Animate mode, with the portal animation being active, scrub through the timeline in the dopesheet to see the effect of the clipping attachment on Spineboy as he goes through the portal.